

Purchasing a fixer-upper property represents one of the most exciting real estate milestones a modern homeowner can experience. It offers a unique canvas to build personal equity, customize architectural aesthetics, and transform a neglected house into a personalized sanctuary. However, beneath the romantic vision of restored hardwood floors and sunlit open kitchens lies a complex web of logistical decisions. Without a clear strategic roadmap, a whole-home renovation can rapidly devolve into budget overruns, trade scheduling conflicts, and compromised structural integrity.
Success in residential restoration relies entirely on executing tasks in the correct sequence. Homeowners frequently make the mistake of prioritizing aesthetic updates before addressing hidden infrastructure, leading to fresh drywall being torn open for emergency pipe repairs or brand-new flooring damaged by heavy construction foot traffic. By establishing a methodical order of operations, property owners ensure that every dollar spent protects their long-term investment. Working alongside licensed home remodelers allows buyers to navigate local building codes, manage subcontractors, and maintain momentum from initial demolition through final walkthrough. Understanding how each renovation phase builds upon the previous one turns an overwhelming project into an organized, highly rewarding experience for the whole family from start to finish.
Phase 1: Protecting the Structure and Securing the Envelope
Before picking out paint colors or browsing kitchen cabinetry, the primary imperative is ensuring the home is dry, stable, and completely sealed against environmental elements. A house with structural defects or active water leaks will continuously ruin any interior progress made inside the structure.
Addressing Foundation and Structural Integrity
Every renovation must begin from the ground up. If a house exhibits sagging floor joists, cracked foundation walls, or compromised load-bearing beams, these structural issues demand immediate remediation. Framing adjustments, beam reinforcements, and basement waterproofing take priority over all cosmetic work. Attempting to install finished materials on an unstable foundation guarantees cracked plaster, sticking doors, and misaligned cabinetry down the line. Structural engineers and framing contractors should inspect the entire support skeleton before any interior wall changes occur to ensure safety and full code compliance across every room in the property.
Securing the Roof and Exterior Shell
Once the foundation is verified as sound, attention immediately shifts to the top of the structure. Inspecting the framing rafters, decking, and flashing prevents costly water damage from ruining fresh interior construction. Conducting an early roof repair protects the home against heavy rain and snow, sealing off vulnerable valleys, chimneys, and ridge lines before trades begin work inside. Removing rotted fascia boards and replacing compromised underlayment creates a secure, dry shell that keeps interior construction on schedule. Protecting the property from environmental moisture at this stage eliminates the risk of hidden mold development behind new drywall and timber studs.
Phase 2: Demolition and Floor Plan Reconfiguration
With a dry, stable structure overhead, the home is ready for interior demolition. This phase transforms the interior layout to match modern living preferences, creating open floor plans or adding necessary structural framing for additional bedrooms and functional living spaces.
Gutting and Clearing Unwanted Materials
Demolition involves safely stripping away non-structural elements, hazardous old insulation, damaged drywall, and outdated fixtures. It is critical to dispose of debris systematically so work areas remain clean and safe for incoming contractors. Hazardous materials like lead paint or old pipe insulation must be identified during initial inspections and professionally abated before general tear-out begins. Clearing out old debris exposes hidden framing flaws and gives trade workers full visibility of electrical and plumbing paths throughout the structure, preventing accidental disruption during later build phases.
Framing New Layouts and Subfloor Preparation
Once the space is cleared to the studs, carpenters can build new interior walls, widen doorways, or reconfigure closet layouts. This step also involves repairing or replacing squeaky, damaged subflooring with sturdy plywood sheathing. Having flat, secure subfloor material is mandatory before any finished surface materials are scheduled for installation in later phases. Properly prepped subfloors prevent floor squeaks and ensure that new wall studs sit square, level, and plumb across every room in the house, establishing clean sightlines.
Phase 3: Mechanical, Electrical, and Plumbing Rough-Ins
With the stud walls exposed and subfloors prepped, the home enters the rough-in stage. This crucial phase involves running all invisible infrastructure behind walls, ceilings, and floors before drywall covers them up completely.
Upgrading Heating, Ventilation, and Air Conditioning
Modern living requires efficient climate control, and old homes usually feature outdated, inefficient ductwork or obsolete heating units. Scheduling comprehensive HVAC services during the rough-in stage ensures proper duct routing through framing bays without sacrificing room heights or closet space. Installing updated heat pumps, air handlers, and smart thermostats early guarantees that workers operate in climate-controlled environments as work progresses. It also guarantees optimal air circulation and energy efficiency throughout the newly reconfigured floor plan, keeping indoor conditions balanced across all seasons of the year.
Plumbing Infrastructure Upgrades
Water supply lines, drain stacks, and gas lines must be routed while stud bays remain accessible. Engaging an experienced local plumber ensures that waste pipes have correct slope, supply lines maintain strong water pressure, and modern PEX or copper lines replace corroded galvanized steel. This stage includes setting heavy shower pans, positioning tub drains, and installing rough valves inside bathroom walls. Completing these rough-ins prior to wall enclosure saves immense labor expenses down the road and prevents accidental wall damage during fixture installation.
Phase 4: Insulation and Drywall Installation
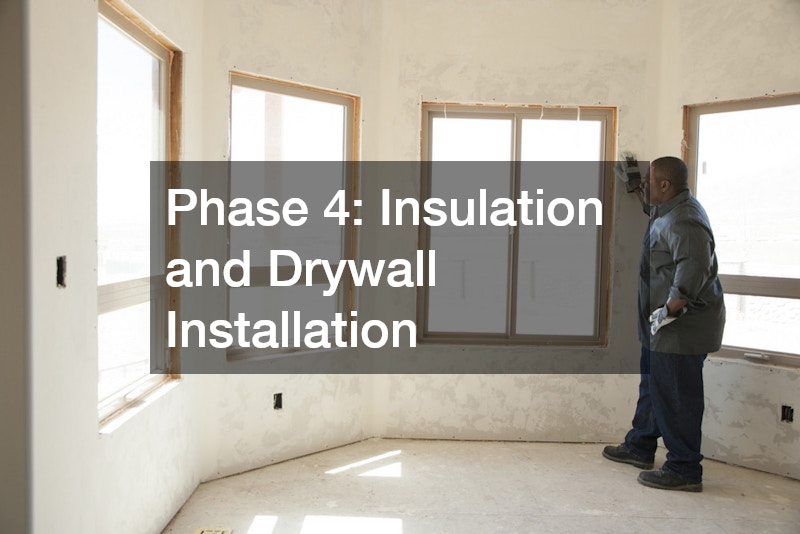
Once all rough-in inspections pass local municipal building checks, the interior walls can finally be enclosed. Proper insulation and drywall application form the clean background for all future interior design features.
Maximizing Thermal Efficiency and Soundproofing
Proper insulation significantly reduces monthly utility expenses while creating a quiet, comfortable living environment. Spray foam, fiberglass batts, or mineral wool insulation should be installed in exterior walls, attics, and around sound-sensitive spaces like bedrooms or home offices before hanging wallboards. Draft-proofing windows, sealing wall gaps, and filling interior partitions with acoustic batts prevents unwanted noise transfer between rooms and maintains consistent indoor temperatures year-round, making the interior far more peaceful and cost-effective to maintain.
Hanging, Taping, and Sanding Drywall
Drywall installation demands skilled labor to achieve smooth, flawless walls. Sheets are hung horizontally, screwed into studs, taped, and mudded over multiple coats. After thorough sanding, a primer coat of paint seals the fresh drywall paper and joint compound, creating a uniform substrate ready for finished coats. Proper priming hides joint tape shadows and ensures that topcoats of paint adhere evenly across every wall surface in the house, setting the foundation for high-end interior aesthetics.
Phase 5: Interior Finishes, Surfaces, and Cabinetry
With smooth walls primed and sealed, the project transitions into finished interior craftsmanship. This stage brings visual warmth, color, and character back into the home through high-quality finish materials.
Installing Durable Tile Surfaces and Flooring
Flooring installation should progress systematically to avoid damage from heavy foot traffic. Bathrooms, mudrooms, and entryways benefit enormously from dense, low-absorption floor tiles that withstand water and daily wear. Laying tile before installing cabinetry creates a continuous floor plane, preventing awkward gaps around built-in furniture and vanity bases. Hardwood or luxury vinyl plank flooring can also be laid in living zones during this window, provided workers protect finished floors with heavy cardboard sheets during subsequent trim work.
Cabinetry, Countertops, and Bathroom Refinishing
Once tile floors cure, custom kitchen cabinets, bathroom vanities, and built-in shelving are secured in place. Stone or quartz countertops are templated and fitted shortly after. In bathrooms where original cast-iron or steel tubs remain structurally sound, scheduling a professional bathtub resurfacing provides a pristine, high-gloss finish without the enormous expense and mess of ripping out historic fixtures. Refinishing existing tubs saves significant budget dollars that can be reallocated to kitchen appliances, upgraded hardware, or custom millwork throughout the home.
Interior Trim, Doors, and Final Painting
Finish carpenters hang interior passage doors, attach baseboards, and fit decorative crown molding. Painters then return to apply final coats of low-VOC paint to walls, ceilings, and trim, giving the interior a fresh, cohesive atmosphere. Careful caulking along trim lines creates crisp seams that define the home architectural character and provide a polished finish throughout every room.
Phase 6: Exterior Upgrades, Entrances, and Driveways

While interior finishes are curing, focus pivots to the exterior envelope. Upgrading functional exterior components protects property value while dramatically elevating curb appeal and home security.
Modernizing Overhead Doors and Access Points
An outdated garage negatively impacts security, energy efficiency, and external aesthetics. Investment in modern garage door installations improves thermal performance through insulated panels while providing smooth, quiet automated operation. Upgrading exterior passage doors and hardware further secures the home against weather drafts and unwanted intruders. Choosing door designs that complement the architectural style of the main house ties the entire exterior design together seamlessly, elevating overall market value and curb appeal.
Driveway Reconstruction and Hardscaping
Heavy delivery trucks and dumpster rentals often take a toll on existing driveways during early demolition and framing phases. Waiting until major interior construction concludes before scheduling driveway paving prevents fresh asphalt or poured concrete from cracking under heavy vehicle loads. A smooth, properly sloped driveway directs surface runoff away from the home foundation while creating a clean, welcoming entry path for family and guests as they arrive.
Phase 7: Landscaping and Outdoor Enhancements
The final stage of a whole-home renovation turns attention toward property grounds and outdoor living areas, seamlessly connecting indoor comfort with the natural environment.
Professional Lawn and Garden Restoration
Construction activity naturally compacts soil and damages existing turf. Partnering with a professional landscaping service allows homeowners to re-establish healthy soil biology, plant native shrubs, install automated irrigation, and plant healthy grass seed or sod. Proper grading during this step prevents standing water around the home while accentuating trees, flowerbeds, and property boundaries for maximum visual impact across the lot.
Creating Functional Outdoor Living Areas
Modern homeowners view the backyard as a direct extension of their indoor footprint. Building an expansive outdoor living space with composite decking, stone pavers, outdoor kitchens, and covered pergolas provides a comfortable area for entertaining and relaxation. Aligning outdoor living zones with interior kitchen or dining access creates an inviting flow throughout the property, turning an underutilized backyard into a favorite daily destination for family gatherings and weekend events.
Phase 8: Final Mechanical Trim Out and Inspection
With major construction complete and finishes installed, trade specialists return for the final trim-out phase to connect fixtures, mount covers, and test overall system operational readiness.
Installing Fixtures, Outlets, and Mechanical Covers
Electricians install light fixtures, outlets, switches, and decorative cover plates throughout every room. Plumbers fit sink faucets, connect toilets, hook up garbage disposals, and install shower heads. Mechanical technicians mount air registers, return vents, and test the heating and cooling equipment to ensure optimal airflow, balanced pressure, and quiet operation before the family moves in permanently.
Final Cleaning and Detailed Walkthrough
A professional construction cleanup crew removes lingering dust from light fixtures, window tracks, window panes, and inside cabinetry drawers. A thorough punch-list walkthrough with primary contractors identifies minor paint touch-ups, cabinet door realignments, or hardware adjustments before signing off on final project completion and paying remaining balances.
Essential Strategies for Managing Your Fixer-Upper Remodel
Navigating a whole-home transformation successfully requires disciplined project management, transparent contractor relationships, and financial flexibility from start to finish.
Establishing Contingency Budgets and Realistic Schedules
Unforeseen conditions frequently arise once walls are opened in older homes, such as outdated electrical wiring or hidden water damage. Experienced homeowners maintain a fifteen to twenty percent financial contingency buffer to handle unexpected repairs without halting work. Similarly, building extra time into project schedules accounts for material shipping delays or seasonal weather interruptions, ensuring that unexpected shifts do not derail overall momentum during critical construction phases.
Partnering with Experienced Renovation Professionals
Managing multiple trade specialists demands deep industry knowledge, regulatory compliance, and constant daily oversight. Working with reputable home remodelers streamlines communications, guarantees licensed trades work in compliance with local permits, and keeps complex project schedules moving forward. Professional guidance minimizes costly mistakes, mitigates project stress, and ensures the finished home meets all modern safety building codes.
Enjoying Your Transformed Home
Transforming a rundown fixer-upper into a tailored, functional residence is a challenging yet profoundly rewarding venture for modern homeowners. By following a disciplined order of operations – starting with structural stability and mechanical infrastructure before moving to interior finishes and exterior grounds – homeowners safeguard their investments against unnecessary rework. Each step builds methodically upon the last, turning a chaotic construction zone into a durable, beautiful property designed to serve its occupants comfortably for decades to come.
